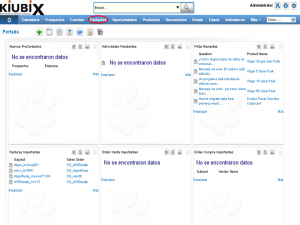
1. Hacemos clic en “Contactos” en la barra de menús.
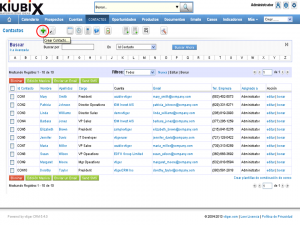
2. Hacemos clic en “Crear Contacto”.
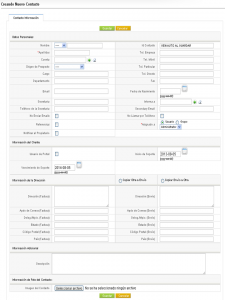
3. A form will appear:
Here's how to fill in each field:
Personal information
- Name: we write the name of the contact.
- Surname: we write the surname of the contact.
- Account: we select the organization to which the contact belongs.
- Origin of the contact: we select the source where we met the contact, which can be: a call, a client, self-generated, a worker, a partner, public relations, email, a conference, a fair, a website, word of mouth or others.
- Position: we write the position held by the contact.
- Department: we write the department where the contact works.
- Email: we write the email of the contact.
- Secretary: we write the name of the contact's secretary.
- Secretary's Phone: we write the contact's secretary's phone number.
- Do not Send Emails: we select if we do not want emails to be sent to the contact.
- References: we select if the contact has references.
- Notify the Owner: we select if we want the contact that has been added to the list to be notified.
- Tel. Company: we write the telephone number of the contact's company.
- Mobile Phone: we write the contact's cell phone.
- Home Tel: we write the contact's home phone number.
- Direct Phone: we write a phone where we can contact the contact directly.
- Fax: we write the contact's fax.
- Date of Birth: we select the date of birth of the contact.
- Report to: we select the contact to which the reports will be sent.
- Alternative Email: we write an alternative email of the contact.
- Do not call by phone: we select if we do not want the contact to be called by phone.
- Assigned to: we select the person or group that will be in charge of the contact.
Customer information
- Portal user: we select if we want to create a portal user for the contact. If we create the user, the accesses will reach the contact via email.
- Support Start: we select the date on which the support service will begin.
- Support expiration: we select the date on which the support service will end.
Address Information
Copy Shipment to Invoice: Selecting this option will copy the information of the shipping address to the information of the invoice address.
Copy Invoice to Shipment: Selecting this option will copy the invoice address information to the shipping address information.
- Address (Invoice): we write the address of the contact that will appear on the invoice.
- Post Office (Invoice): write the PO box of the contact that will appear on the invoice.
- Deleg./Mpio. (Invoice): we write the delegation or municipality where the contact that will appear on the invoice is located.
- Status (Invoice): we write the status of the contact that will appear on the invoice.
- Postal Code (Invoice): we write the postal code of the contact that will appear on the invoice.
- Country (Invoice): we write the country where the contact that will appear on the invoice is located.
- Address (Shipping): we write the address of the contact where the products will be sent.
- Post Office (Shipping): write the PO box of the contact where the products will be sent.
- Deleg./Mpio. (Shipping): we write the delegation or municipality where the contact where the products will be sent is located.
- Status (Shipping): we write the status of the contact where the products will be shipped.
- Postal Code (Shipping): we write the postal code of the contact where the products will be sent.
- Country (Shipping): we write the country where the contact is located where the products will be sent.
Additional Information
- Description: in this part we can write a note or additional information about the contact.
Contact Photo Information
- Contact Image: we select the file that has the contact's photo.
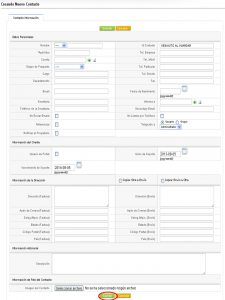
4. When we have finished we click on the "Save" button.
TUTORIAL
[vsw id=”dqc_1Clac1o” source=”youtube” width=”640″ height=”344″ autoplay=”no”]





No Comment