New technologies advance and it has been a long time since the Internet went from being an exclusive network of computers, to a new one where different gadgets and devices coexist, ranging from mobile phones, video game consoles, alarms and even household appliances.
And it is that with the arrival of Smartphones such as iPhone, or "smart phones" the new culture of "always being connected" is imposed, which is why every day users who use the phone to check email or visit a website increase. .
Although setting up an email account, as we will see, may seem very simple, the variety of devices, applications and user interfaces to access email can be quite disorienting.

Rare is the week in which we do not receive calls from a customer who has purchased an iPhone that he does not know how to configure to check his mail.
In this article we will go over in simple steps, how to set up an email account on an iPhone.
Before continuing a clarification:
To configure an email account, whether on the device or program that is (iPhone, Android, Blackberry, Outlook, Thunderbird, Eudora, etc.), we must have at hand some information provided by KIUBIX.
These are:
- Incoming mail server (pop3 / impap): mail.mydomain.com
- Outgoing mail server (smtp): mail.mydomain.com
- E-mail. (The email address that we want to configure)
- Name of the account or user: The user will be the same as your email address.
- Password (the password that will be used to identify us on the server).
*Nota: Reemplazar “midominio” por su dominio registrado
Step 1.- Click on the “Settings” program and within it we select “Mail, contacts, calendars”.
Step 2.- Click on add account and it will show us a configuration wizard.


As the email to configure is corporate we choose the option Others.
Step 3.- We will fill in some basic information about the account.

- Name - The name of our email account. It is the name of the sender that those who receive an email from us will see.
- Address - Our email for example [email protected]
- Description - A description to distinguish this account from others.
Step 4.- It will ask us what protocol we will use to download the emails to the phone.

For our case we will choose POP *.
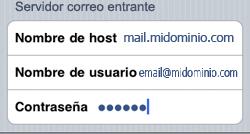
Step 5.- Incoming mail server. We will configure it with the data that we had recorded.
Step 6.- Outgoing mail server. We will fill in the requested data.
Step 6.- We save the changes by pressing the Save button.
At that point the phone will do a check and maybe show us a message like this.

In this case, we press continue and the phone will already be configured.
Additional settings.
Finally, we can review some additional account settings for this by accessing the Preferences option within Mail.
Here we can activate / deactivate the authentication for sending and the use of SSL. The first will be mandatory for any provider at present, however the use of SSL not all providers implement, so we must uncheck the SSL access option if necessary.
* POP or IMAP?
This is a common query from many clients… what is the difference between POP and IMAP?POP is the oldest and most universal protocol for downloading emails. Its main feature is that it removes the mail from the mailbox of the account on the Internet once it is downloaded.
On the other hand, IMAP downloads a duplicate of the message, leaving the original in the internet mailbox and deletes it if we delete it from the phone. This feature is interesting if we have the same account configured on another device (for example a computer). On the other hand, it has a drawback, if we do not delete the messages from the server, the mailbox will end up filling up and we will stop receiving emails.
To avoid the problem of a full mailbox, it is usual to use POP3, indicating in the additional configuration to keep a copy of the messages on the server (indefinitely or for a specific number of days), in this way it will eliminate the emails from the server in a reasonable time .


[…] To begin, as we did in the case of the iPhone, remind you that to configure an email account on any device you must first have […]
[…] «How to configure a corporate email on iPhone […]